Generative Art
Artistic Documentation
In this project, we explored generative art by flashing generative text onto ESP32 devices.
Exploring the ESP32
We began by exploring our ESP32 TTGO-- microcontrollers with a color display.
Artistic Vision
We then moved on to the artistic component of the installation: I chose to have white text on a black background, displaying a selection of verbs that incite motion. Living is moving, and living is feeling. It is easy to sleep the days away, so I thought I would use this project to revitilize myself. I chose a delay of 500 ms between each new word, and began with the word "go." The constant changing of the words, and the word "go" separated from all the rest pushes the viewer to listen, to go. Life is improvisation, and improvisation is randomness. Yet there is a power in simplicity. I wanted my display to be undistracting, yet clear. This is why I set each word in the exact same location, except for "go". This is why each verb is only one syllable. The rigidity in only 10 words makes space for the viewer's imagination.
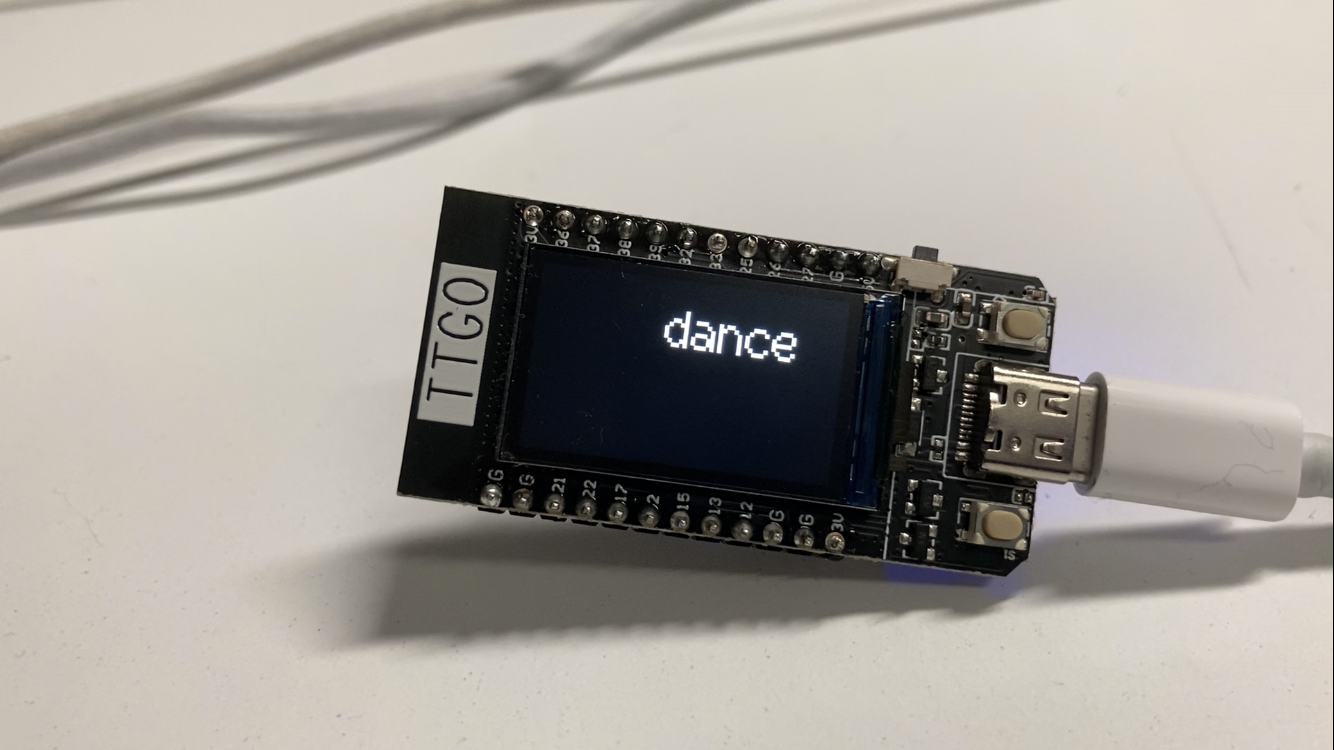
I originally only chose four words: "run", "dance", "fly", and "jump". There were many other contendors ("play", "move", "make", "grow"), but I realized that just as it is important to physically act, it is important to emotionally act. Taking internal, mental action is also the opposite of sleep, in a way. I added "feel", "cry", "cheer", "draw", and "need". I wasn't sure if these were perfect, but that was okay. I want this code to be a work in progress.
Something unexpected that I thought I would take out but turned out to enjoy was when my code randomly chose the same word twice. I had a black screen come for a moment between each word, so it really does look like the word is repeated. This felt powerful, and I like how the art itself took my intention and message, and gave me back something unexpected and inventive in its generative component.
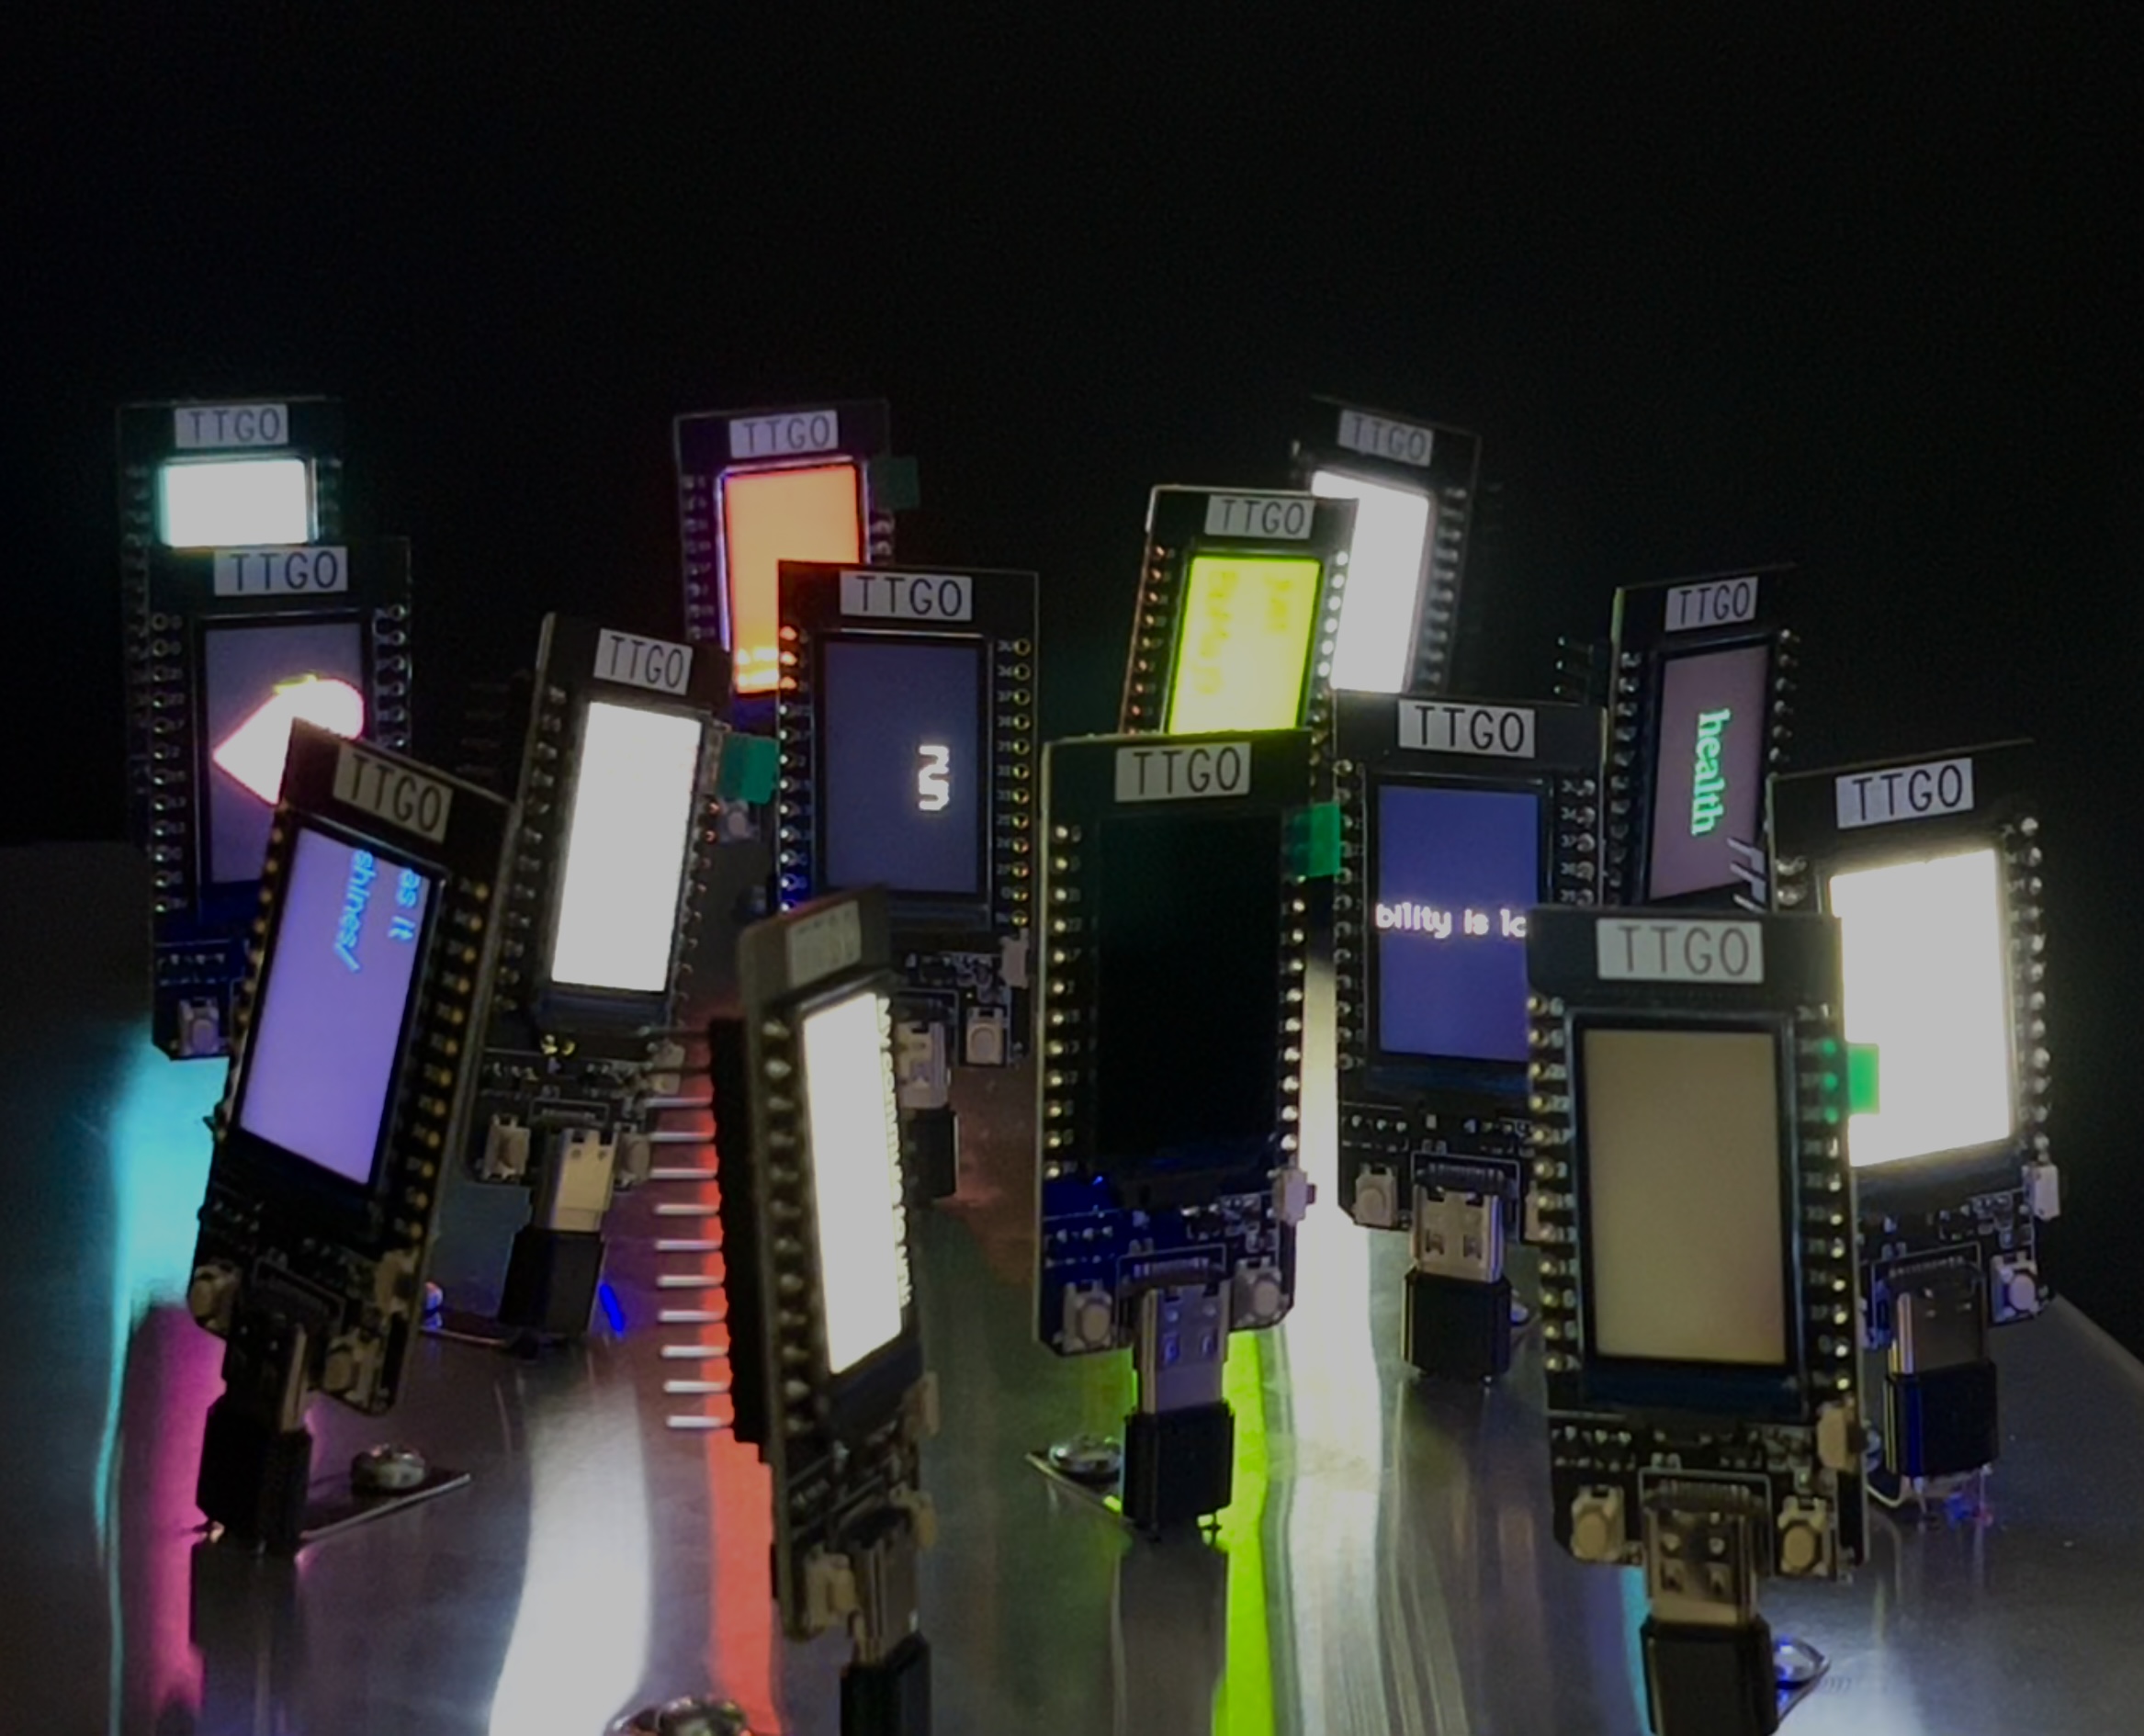
The Installation
It was exciting to see my work next to everyone elses. Other people did more with color, and I enjoyed the contrast between their complexity and my simplicity. Watch this video to see clips from the day of the installation, as well as the text from my device.
Challenges that I experienced in this project centered on the powering of the device, yet it also was one of the most fulfilling aspects of the journey. We were given lipo batteries, and after plugging mine into my board, the board heated up. I got a new board, and went to the Design Center to solder my JST connector. Luckily for me, I experienced no issues. I was able to cut, strip, solder, and use a hairdryer on the heat shrink until I had a fully soldered battery. As someone often afraid of hardware, it felt empowering and in line with the artistic aspect of this installation to feel a sort of ownership over the physical technology we used.
To try this yourself, follow the below technical description, or follow this link to my code repository.
Technical Documentaion
Link to github repository: https://github.com/susannaha8/Creative-Embedded-Systems
Installing the Software
For Mac users, install Arduino IDE version 1.8.19 (this is a Legacy version, not the most recent one). You also may need to install the driver listed on this forum (https://github.com/Xinyuan-LilyGO/LilyGo-T-Call-SIM800/issues/139#issuecomment-904390716) if you are getting errors when trying to upload code to your device.
Setting Up the Environment
Once in the Arduino software, add the ESP32 board by clicking on "Arduino", then "Preferences". You should see a section called "Additional Boards Manager URLs". Add the following
URL: https://dl.espressif.com/dl/package_esp32_index.json
Add the correct library by clicking on "Tools", then "Library Manager". Search for TFT_eSPI and install. You should now see all library folders in the /Arduino folder on your computer. To find where your /Adruino folder is, check "Preferences" for the sketchbook location.
To finish setup, go to /Arduino/libraries/TFT_eSPI/User_Setup_Select.h. Comment out `#include
Flashing Code to the Device
Explore the example code to familiarize yourself with the syntax. Be sure to select examples from the TFT_eSPI custom library with display size 160 x 128. Each example has code that runs in a loop, and you can time certain displays by setting `delay()`. In my code, I used `fillScreen()`, `setCursor()`, `setTextColor()`, and `println()`. For this assignment, to create generative art that has some degree of randomness, I used the `rand()` function. Once your code is ready, plug your ESP32 into your computer, go to "Tools" and select the correct "Port", and upload your code to your device!
Powering the Installation
Originally, we planned to power our ESP32s with lipo batteries. We were provided JST connectors, and we were able to solder the connectors to the power and ground cables of the battery.

Due to some safety concerns with the batteries, we ended up scrapping the batteries in favor of a board that housed all the students' ESP32s and powered them with a single battery. During the installation, we adjusted the placement of the wires to ensure the base of the structure itself wasn't conducting the current.
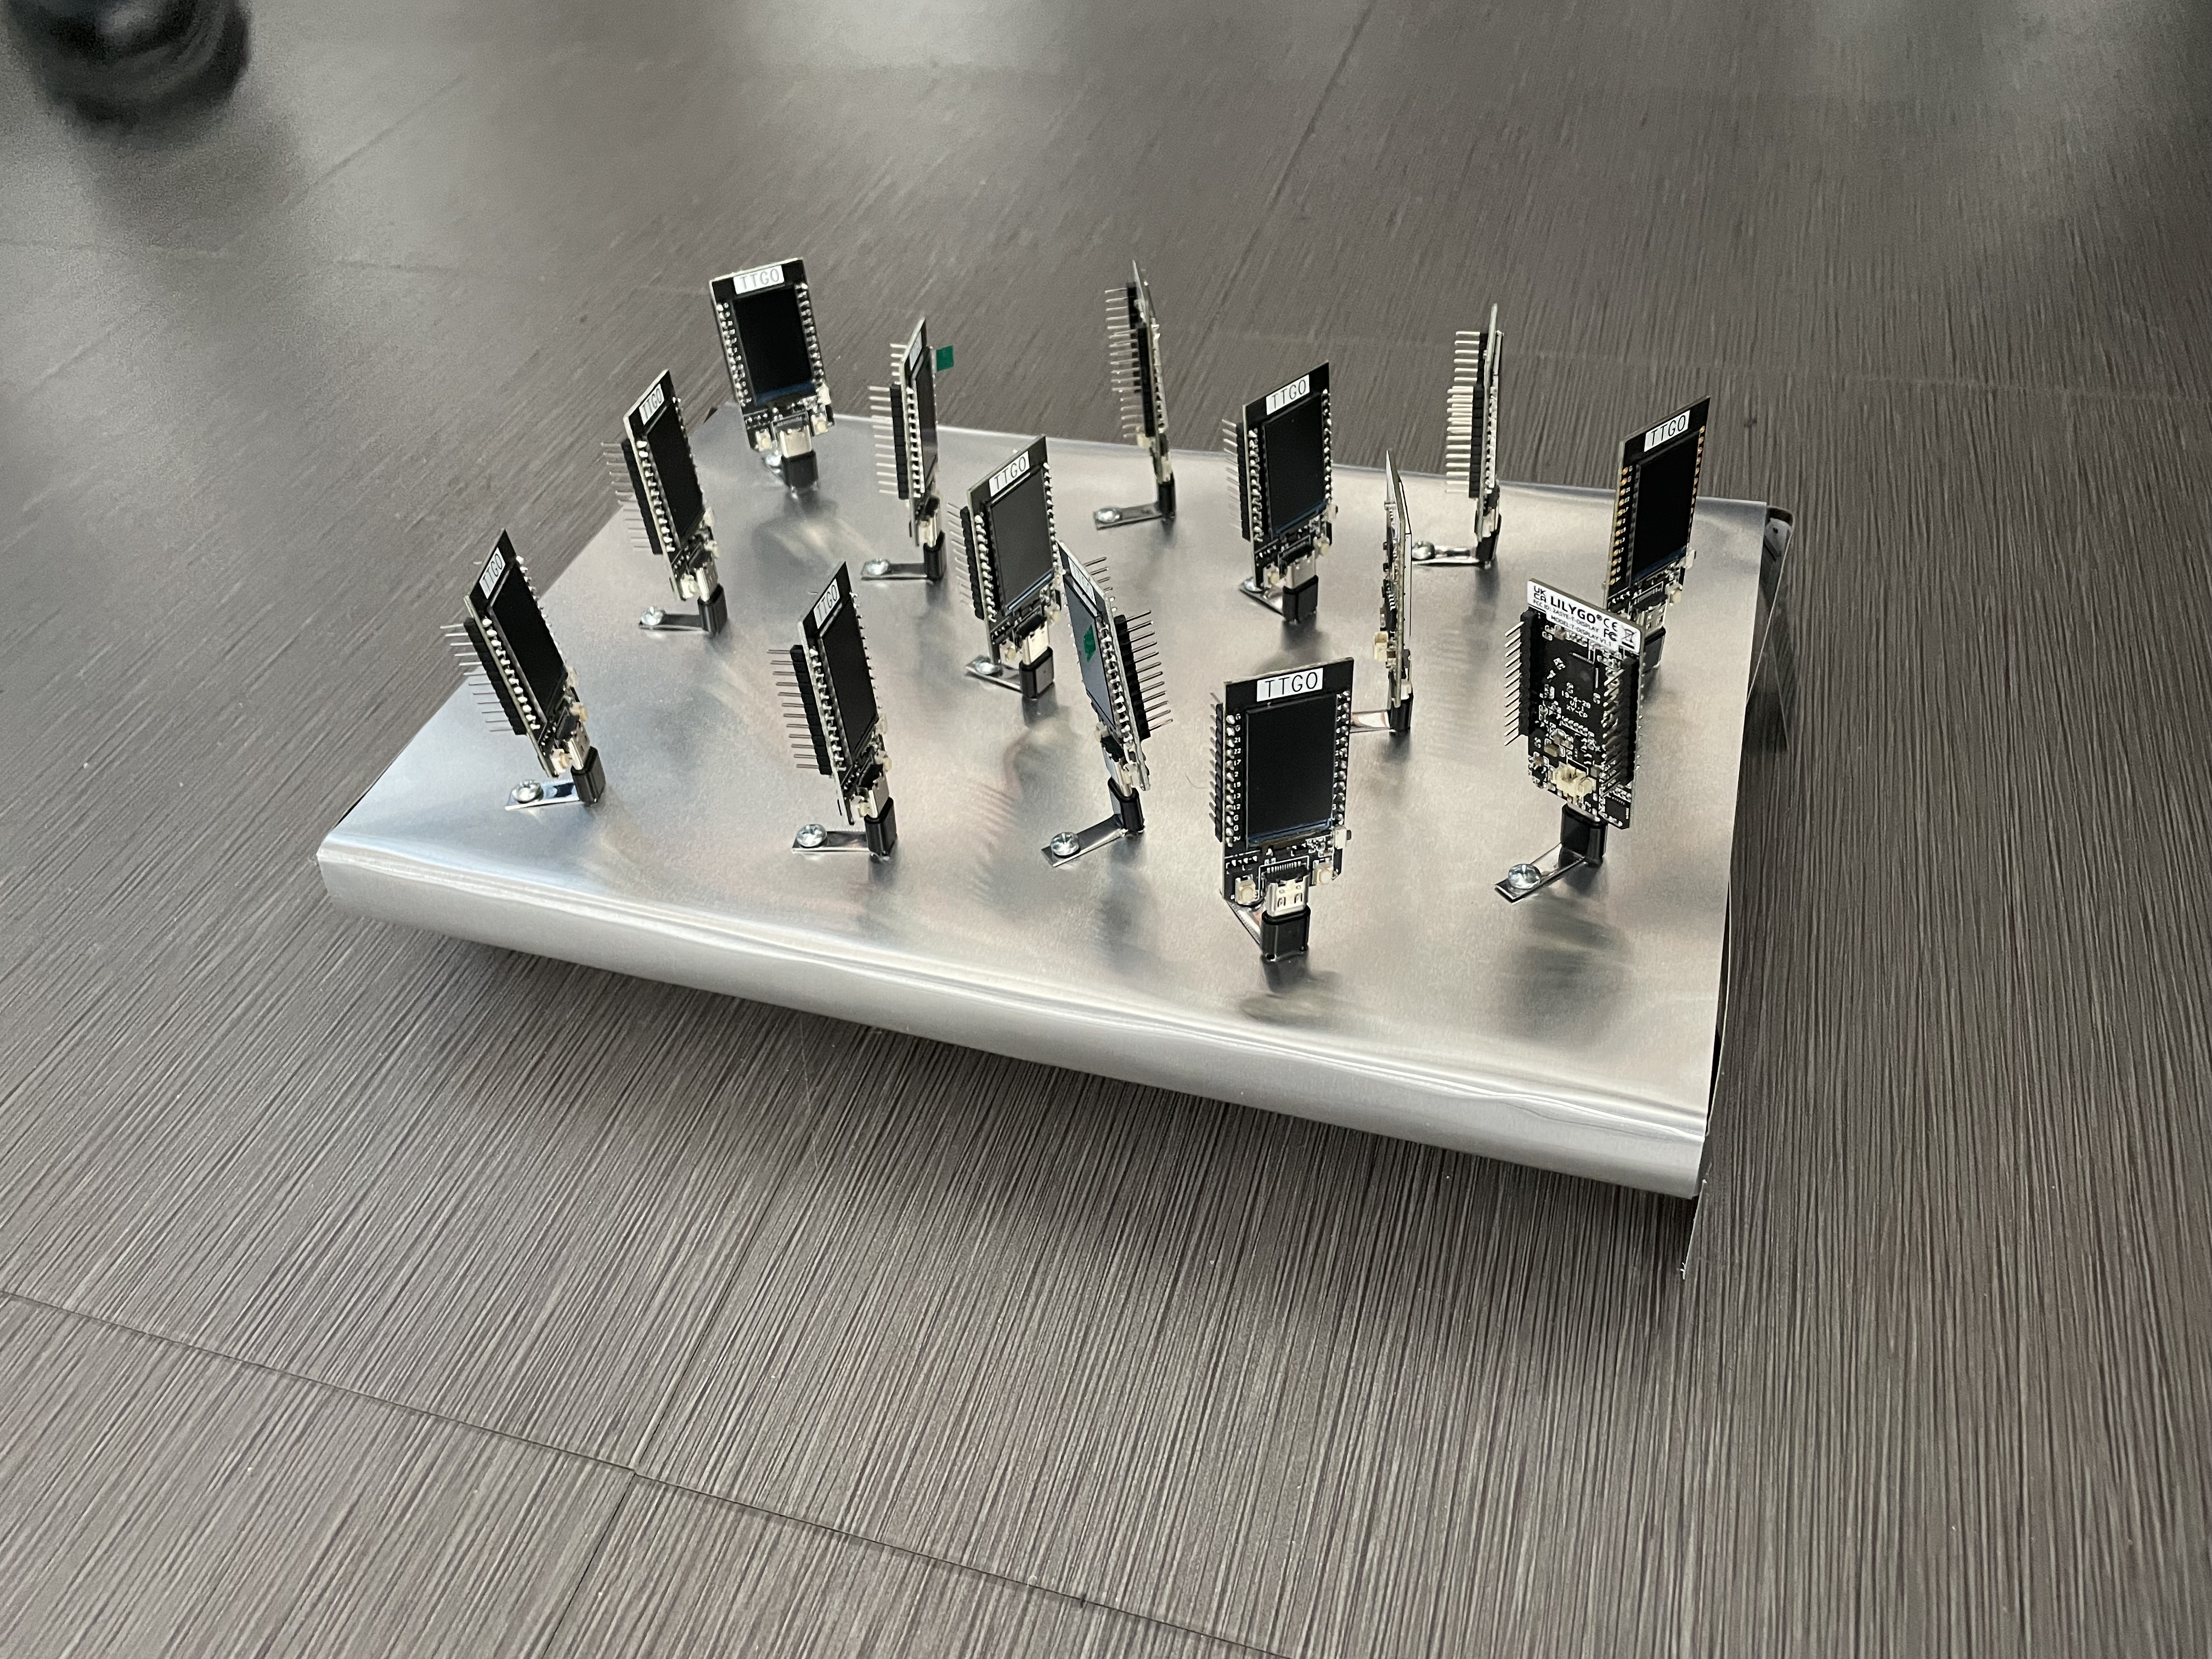
Here was the final result!